跳到主要内容

Python TypeError AsyncConnectionPool init got an unexpected keyword argument socket options

· 阅读需 1 分钟
素明诚
Full stack development

stable diffusion 启动遇到错误

(venv) PS D:\Desktop\Private\stable-diffusion-webui-windows> .\webui-user.bat
venv "D:\Desktop\Private\stable-diffusion-webui-windows\venv\Scripts\Python.exe"
Python 3.10.6 (tags/v3.10.6:9c7b4bd, Aug 1 2022, 21:53:49) [MSC v.1932 64 bit (AMD64)]
Version: v1.6.0-14-g27096813
Commit hash: 2709681331de6031ee9dc80abe218d336ad4c6ee
Installing requirements
Launching Web UI with arguments: --api --xformers --opt-sdp-no-mem-attention --enable-insecure-extension-access --listen
Traceback (most recent call last):
File "D:\Desktop\Private\stable-diffusion-webui-windows\launch.py", line 48, in <module>
main()
File "D:\Desktop\Private\stable-diffusion-webui-windows\launch.py", line 44, in main
start()
File "D:\Desktop\Private\stable-diffusion-webui-windows\modules\launch_utils.py", line 432, in start
import webui
File "D:\Desktop\Private\stable-diffusion-webui-windows\webui.py", line 13, in <module>
initialize.imports()
File "D:\Desktop\Private\stable-diffusion-webui-windows\modules\initialize.py", line 21, in imports
import gradio # noqa: F401
File "D:\Desktop\Private\stable-diffusion-webui-windows\venv\lib\site-packages\gradio\__init__.py", line 3, in <module>
import gradio.components as components
File "D:\Desktop\Private\stable-diffusion-webui-windows\venv\lib\site-packages\gradio\components\__init__.py", line 1, in <module>
from gradio.components.annotated_image import AnnotatedImage
File "D:\Desktop\Private\stable-diffusion-webui-windows\venv\lib\site-packages\gradio\components\annotated_image.py", line 12, in <module>
from gradio import utils
File "D:\Desktop\Private\stable-diffusion-webui-windows\venv\lib\site-packages\gradio\utils.py", line 353, in <module>
class AsyncRequest:
File "D:\Desktop\Private\stable-diffusion-webui-windows\venv\lib\site-packages\gradio\utils.py", line 372, in AsyncRequest
client = httpx.AsyncClient()
File "D:\Desktop\Private\stable-diffusion-webui-windows\venv\lib\site-packages\httpx\_client.py", line 1397, in __init__
self._transport = self._init_transport(
File "D:\Desktop\Private\stable-diffusion-webui-windows\venv\lib\site-packages\httpx\_client.py", line 1445, in _init_transport
return AsyncHTTPTransport(
File "D:\Desktop\Private\stable-diffusion-webui-windows\venv\lib\site-packages\httpx\_transports\default.py", line 275, in __init__
self._pool = httpcore.AsyncConnectionPool(
TypeError: AsyncConnectionPool.__init__() got an unexpected keyword argument 'socket_options'

TypeError: AsyncConnectionPool.__init__() got an unexpected keyword argument 'socket_options' 错误,从多个讨论和解决方案中,一个常见的建议是将 httpx 库降级到 0.24.1 或更早的版本。这个错误通常是由于 httpx 新版本(大于 0.24.1)中引入了一个不兼容的变更所导致的。根据 GitHub 上的用户反馈和讨论,降级 httpx 可以解决这个问题

https://github.com/AUTOMATIC1111/stable-diffusion-webui/issues/13840### 降级版本

pip install httpx==0.24.1

重新启动
Python 没 requirementstxt 如何安装包

· 阅读需 1 分钟
素明诚
Full stack development

先安装 pipreqs 生成项目需要的 requirements.txt 文件

pip install pipreqs

生成文件

 pipreqs .

安装

pip install -r requirements.txt

注意这里,如果已经存在了 requirements.txt 你想覆盖的话直接 -f

pipreqs . --force

Python 虚拟环境使用

· 阅读需 2 分钟
素明诚
Full stack development

创建虚拟环境

打开命令行工具

  • Windows 打开命令提示符或 PowerShell。
  • Unix/macOS 打开终端。

创建虚拟环境

在项目目录内,运行以下命令创建虚拟环境

python -m venv venv

这里 venv 是虚拟环境目录的名字,可以按需更改。该命令会在当前目录下创建一个名为 venv 的文件夹,其中包含 Python 解释器和 pip。

激活虚拟环境

Windows

.\venv\Scripts\activate

windows bash

source venv/Scripts/activate

Unix/macOS

source venv/bin/activate

安装依赖

安装项目所需的依赖, 记得这里要进入虚拟环境进行依赖按照,否则还是安装在全局

pip install <package_name>

使用虚拟环境

虚拟环境激活期间,任何 Python 和 pip 命令都将使用虚拟环境中的版本。这意味着你可以运行应用程序、脚本测试或添加更多依赖,就像在全局环境中操作一样。

注意事项

  • 保持虚拟环境目录与项目代码一致通常,将虚拟环境目录放在项目根目录下,但不要将其加入到版本控制系统(如 git)中。可通过 .gitignore 文件排除虚拟环境目录。
  • 依赖管理为了确保其他开发者或部署环境能够准确复现你的环境,经常使用 pip freeze > requirements.txt 命令将当前虚拟环境中安装的所有包及其版本导出到 requirements.txt 文件中。其他人可以通过 pip install -r requirements.txt 命令在他们的虚拟环境中安装相同的依赖。
  • 退出虚拟环境当完成工作,需要退出虚拟环境时,使用 deactivate 命令。这将恢复到系统的全局 Python 环境。

修改 PowerShell 执行策略

· 阅读需 1 分钟
素明诚
Full stack development

PowerShell 的执行策略帮助保护您的计算机不被恶意脚本执行,但同时它也可能阻止了一些合法脚本的执行。为了解决这个问题,您需要更改 PowerShell 的执行策略。

执行命令

  1. 打开 PowerShell 作为管理员(搜索 PowerShell,右键点击,选择“以管理员身份运行”)。
  2. 执行上述任一 Set-ExecutionPolicy 命令。
  3. 如果系统提示确认,输入 Y 并按回车键以确认更改。

临时更改执行策略

如果您只是想临时更改执行策略以激活虚拟环境,可以使用以下命令

Set-ExecutionPolicy -Scope Process -ExecutionPolicy Bypass

永久更改执行策略

如果您想永久更改执行策略,可以使用以下命令

Set-ExecutionPolicy -ExecutionPolicy RemoteSigned

云服务器 Ubuntu 如何访问 GitHub

· 阅读需 1 分钟
素明诚
Full stack development

打开项目地址,你可以按照项目 markdown 进行操作

https://github.com/521xueweihan/GitHub520### 或者,直接复制它更新的 hosts

1. 备份当前文件

sudo cp /etc/hosts /etc/hosts.backup

2. 编辑 hosts 文件

sudo nano /etc/hosts

将从 GitHub520 项目页面复制的 hosts 文件内容粘贴到本地的 /etc/hosts 文件中。确保不要删除或覆盖文件中已有的内容,特别是关于 localhost 的配置。

3. 保存后退出

重启计算机或者 sudo systemctl restart NetworkManager

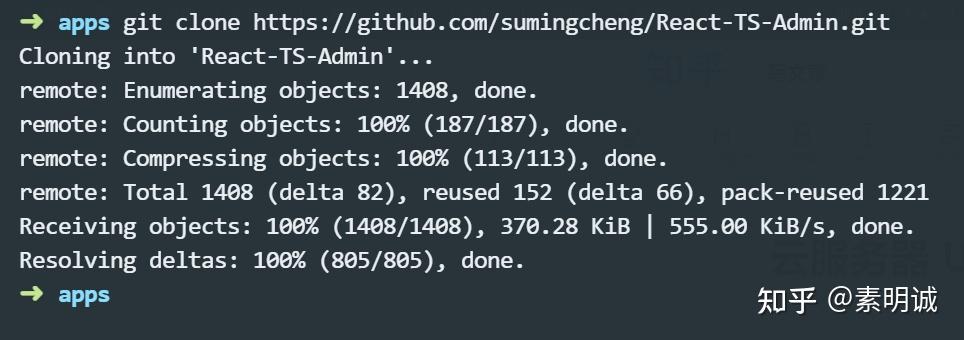
重新 clone 项目

73563c97d518edee667c3750f4d55d27

前端对接 Python SSE

· 阅读需 1 分钟
素明诚
Full stack development

Python 代码

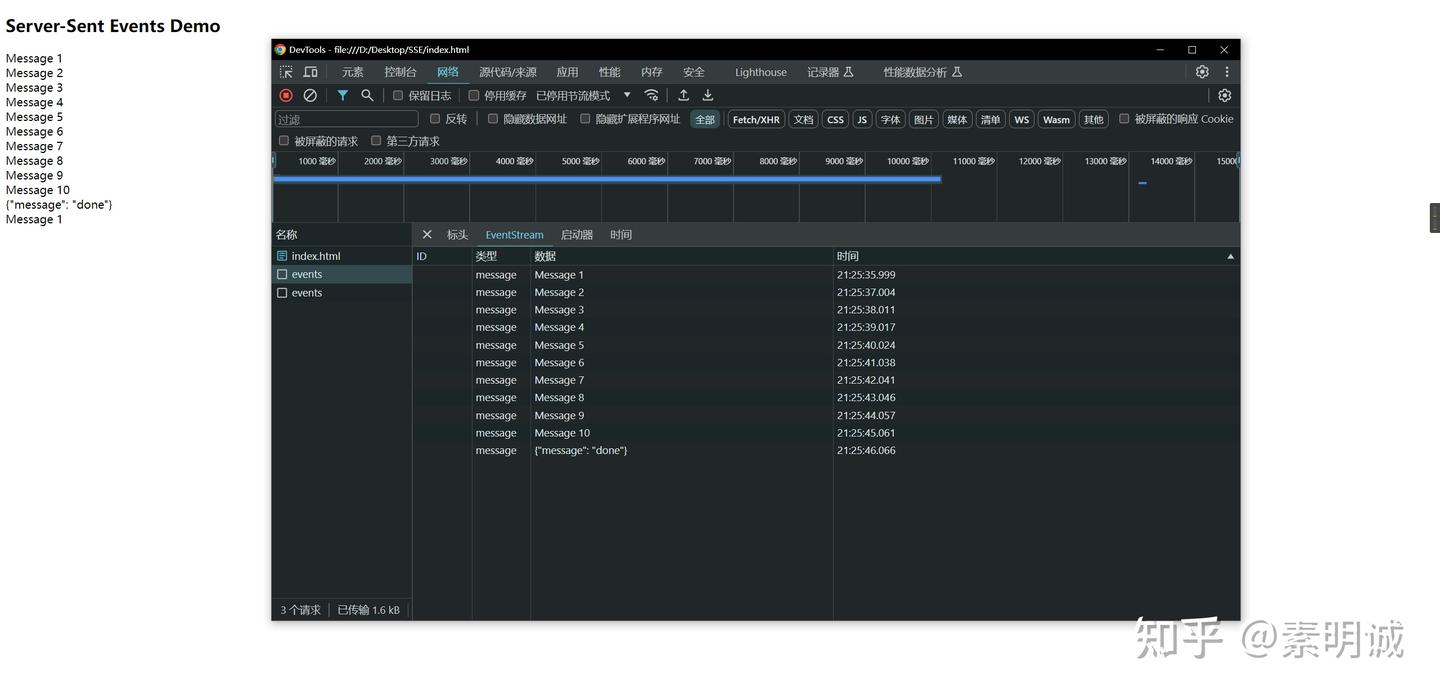
请求后 每 10s 向前端发送数据

from flask import Flask, Response, json
from flask_cors import CORS
import time

app = Flask(__name__)
CORS(app) # 允许所有域进行跨域请求

@app.route('/events')
def events():
def generate():
for i in range(1, 11): # 生成10次数据
yield f"data: Message {i}\n\n"
time.sleep(1) # 每秒发送一次

# 发送完成信号
yield f"data: {json.dumps({'message': 'done'})}\n\n"
return Response(generate(), mimetype='text/event-stream')

if __name__ == '__main__':
app.run(debug=True, threaded=True)

前端请求接口对接 SSE

<!DOCTYPE html>
<html lang="en">
<head>
<meta charset="UTF-8" />
<title>SSE Demo</title>
<script>
window.onload = () => {
const eventSource = new EventSource('http://127.0.0.1:5000/events');
eventSource.onmessage = function (event) {
const data = event.data;
console.log(data);
if (data.message === 'done') {
// 收到完成信号,关闭连接
eventSource.close();
console.log('All data received, connection closed.');
} else {
// 显示接收到的消息
const message = document.createElement('div');
message.textContent = event.data;
document.body.appendChild(message);
}
};
};
</script>
</head>
<body>
<h2>Server-Sent Events Demo</h2>
</body>
</html>

59aa7dc28e6fec13cf51271f629f9ea3

Git 放弃所有未跟踪未进行管理的文件

· 阅读需 1 分钟
素明诚
Full stack development

公司前端项目进行文件结构上的大调整,导致有巨多 node_modules 里面的文件没有被跟踪,所以就要额外的去清理,否则连文件都无法提交,除非进入到你要提交文件的目录下,才可以正常的提交。所以就要删除这些未跟踪的文件。

查看哪些文件要被删除

git clean -n

删除未跟踪的文件

git clean -f

如果还包括未跟踪的目录,请使用

git clean -fd

IPFS 常见命令

· 阅读需 2 分钟
素明诚
Full stack development

初始化本地 IPFS 配置文件。这是开始使用 IPFS 的第一步

ipfs init

将文件添加到 IPFS 网络。这会返回一个唯一的哈希值,用于检索文件

ipfs add <file>

通过其哈希值检索文件的内容

ipfs cat <hash>

从 IPFS 下载文件或目录

ipfs get <hash>

固定(Pin)一个对象到本地存储,防止它被垃圾回收

ipfs pin add <hash>

从本地存储取消固定(Unpin)一个对象

ipfs pin rm <hash>

列出给定哈希的对象链接

ipfs ls <hash>

列出哈希对象的链接

ipfs refs <hash>

获取原始 IPFS 块

ipfs block get <hash>

存储原始 IPFS 块

ipfs block put <file>

启动 IPFS 守护进程

ipfs daemon

显示带宽统计

ipfs stats bw

显示当前连接的节点

ipfs swarm peers

发布 IPNS 名称

ipfs name publish <hash>

解析 IPNS 名称

ipfs name resolve <name>

运行垃圾收集清理未引用的文件

ipfs repo gc

查看或修改配置文件

ipfs config

直接与 DHT(分布式哈希表)进行交互

ipfs dht

生成新的 IPNS 键

ipfs key gen

管理文件存储数据

ipfs filestore

语雀如何显示 Markdown 代码

· 阅读需 1 分钟
素明诚
Full stack development

正常的文章链接

https://www.yuque.com/sumingcheng/javascript/xpqxals311uwidck

访问后是文章,无法复制 markdown 的内容

在链接后增加参数

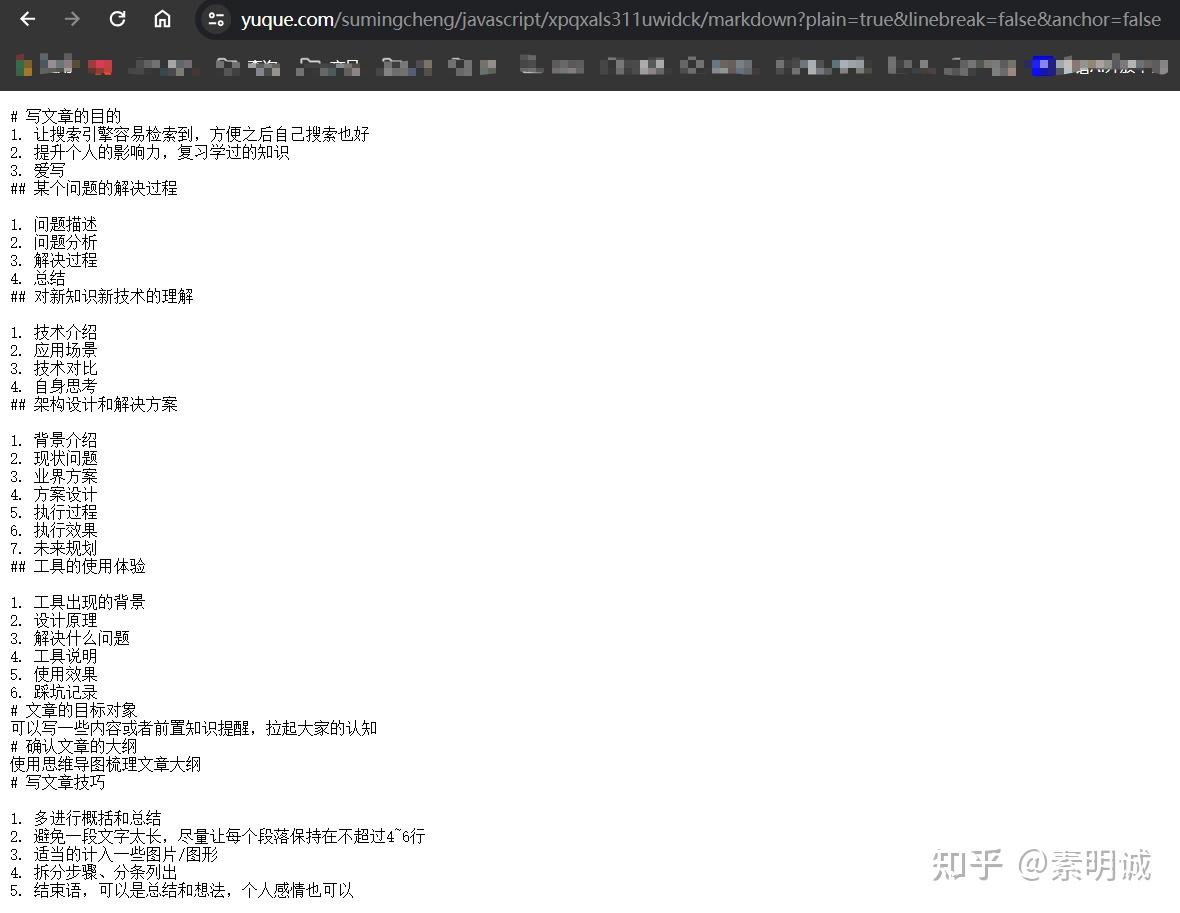
/markdown?plain=true&linebreak=false&anchor=false

直接显示代码

be0a07347c6715499ecbc27cf444cb9e